
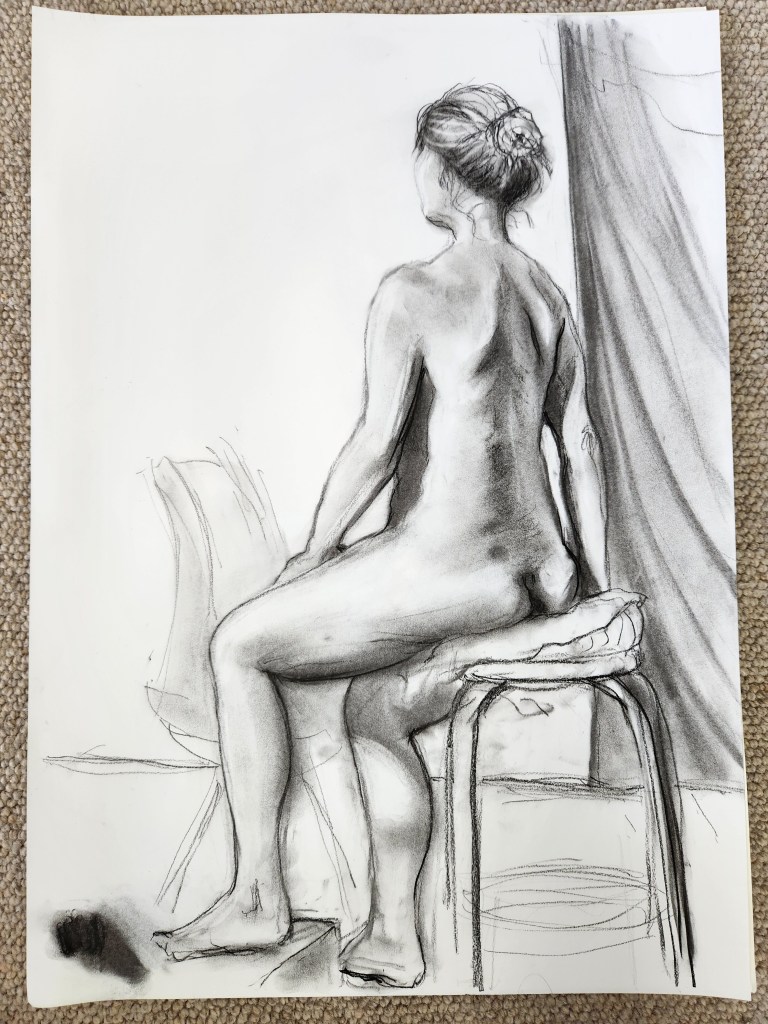
Continuing on from last week, when I showed you the charcoal sketch (see above) which I would be transposing onto an A2canvas. As I am going to take you through that process I thought it would help to include it here as this is the pose I shall continue to work from.

First, I held my charcoal sketch face-first against a window, and drew roughly around the outline with a sanguine-coloured pastel. This was because the original sketch was on paper too thick to see through, and the window acts as a light box.
My apologies, but I missed taking a photo of the thin pastel outline I’d imprinted on the canvas.
I lay the charcoal sketch, face up, on top of the canvas and drew through the charcoal with a B pencil. It produced a faint line in pastel. The idea being that line would be eventually masked by the paint.
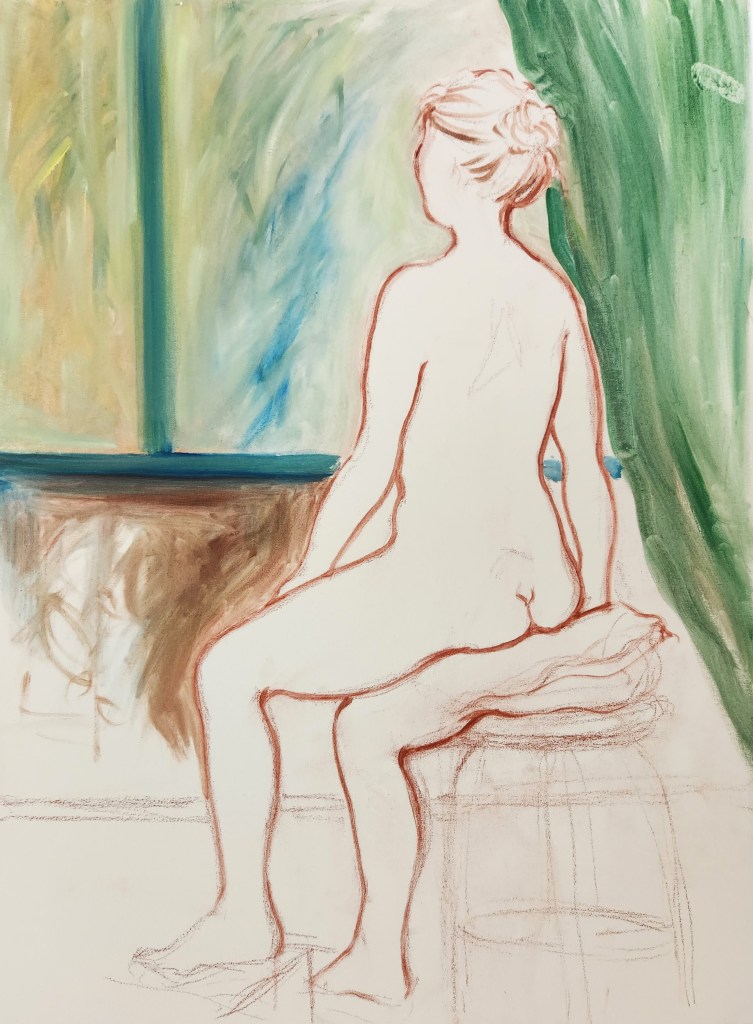
It took me ages to set up my gear as I’d accidentally left the oil medium and my larger paint brushes at home!! So, using a smaller brush than desired, I decided to mark some colour for the background anyway, popping in lines for a non-existent window, and the sweep of cloth, which I intend to look like velvet when finished. In reality there is a faded red sheet pinned on the wall, but I do like a bit of fiction, as some of you may know. Whoops, noticed I’d misjudged a line with the leg/cushion and seat on the painted version. Will get onto that. Just two more weeks to go.
Other students were sketching away, and not yet ready to take the next step to painting. I decided that I would take my canvas home and continuing working seeing I really wanted that larger brush and oil medium. At this point the poor model announced she was cold, and the heating system inadequate. The tutor said he’d sort it for the following week, and asked if she would mind wearing her gown and we’d finish with a shorter pose. I grabbed more paper and a hearty 6B pencil. I went for it as you can see and really enjoyed the freedom of a 5min sketch.

More to come.

Your quick sketch at the end of the post was a delightful surprise. it’s very lively.
LikeLike
I truly enjoy seeing each step and how your work progresses. I am sorry that the model became cold but it gave you an opportunity for a lovely sketch. You have caught the model’s expression perfectly. Look forward to your next progress report.
LikeLike
Thanks Yvonne, though after ‘fiddling’ with the painting at home this week, I am now unsure what I will do with it when in class this afternoon. A part of my wants to toss it aside and stick to my sketching, which I do like best. However, a challenge is good for one I believe.
LikeLiked by 1 person
Thanks for walking us through the process, Vivienne. I feel like I am getting the benefit of the class without actually attending it! Great sketch. The poor model. I often wonder how much discipline it must take to life model for long stretches.
LikeLiked by 1 person
In response to your question. The model should be well looked after, ensuring many breaks through a long session. Marking where feet were, how the seat was placed, all come to play. Being warm should be a priority. Fortunately this was an experienced model who said if she need more breaks.
LikeLike